Jeep Parts Wiki | Ford Parts Wiki
Home | Search | Browse | Marketplace | Messages | FAQ | Guest
|
Body Service Manual August 1964 |
|
Prev
 Next
Next
4226000
4226000
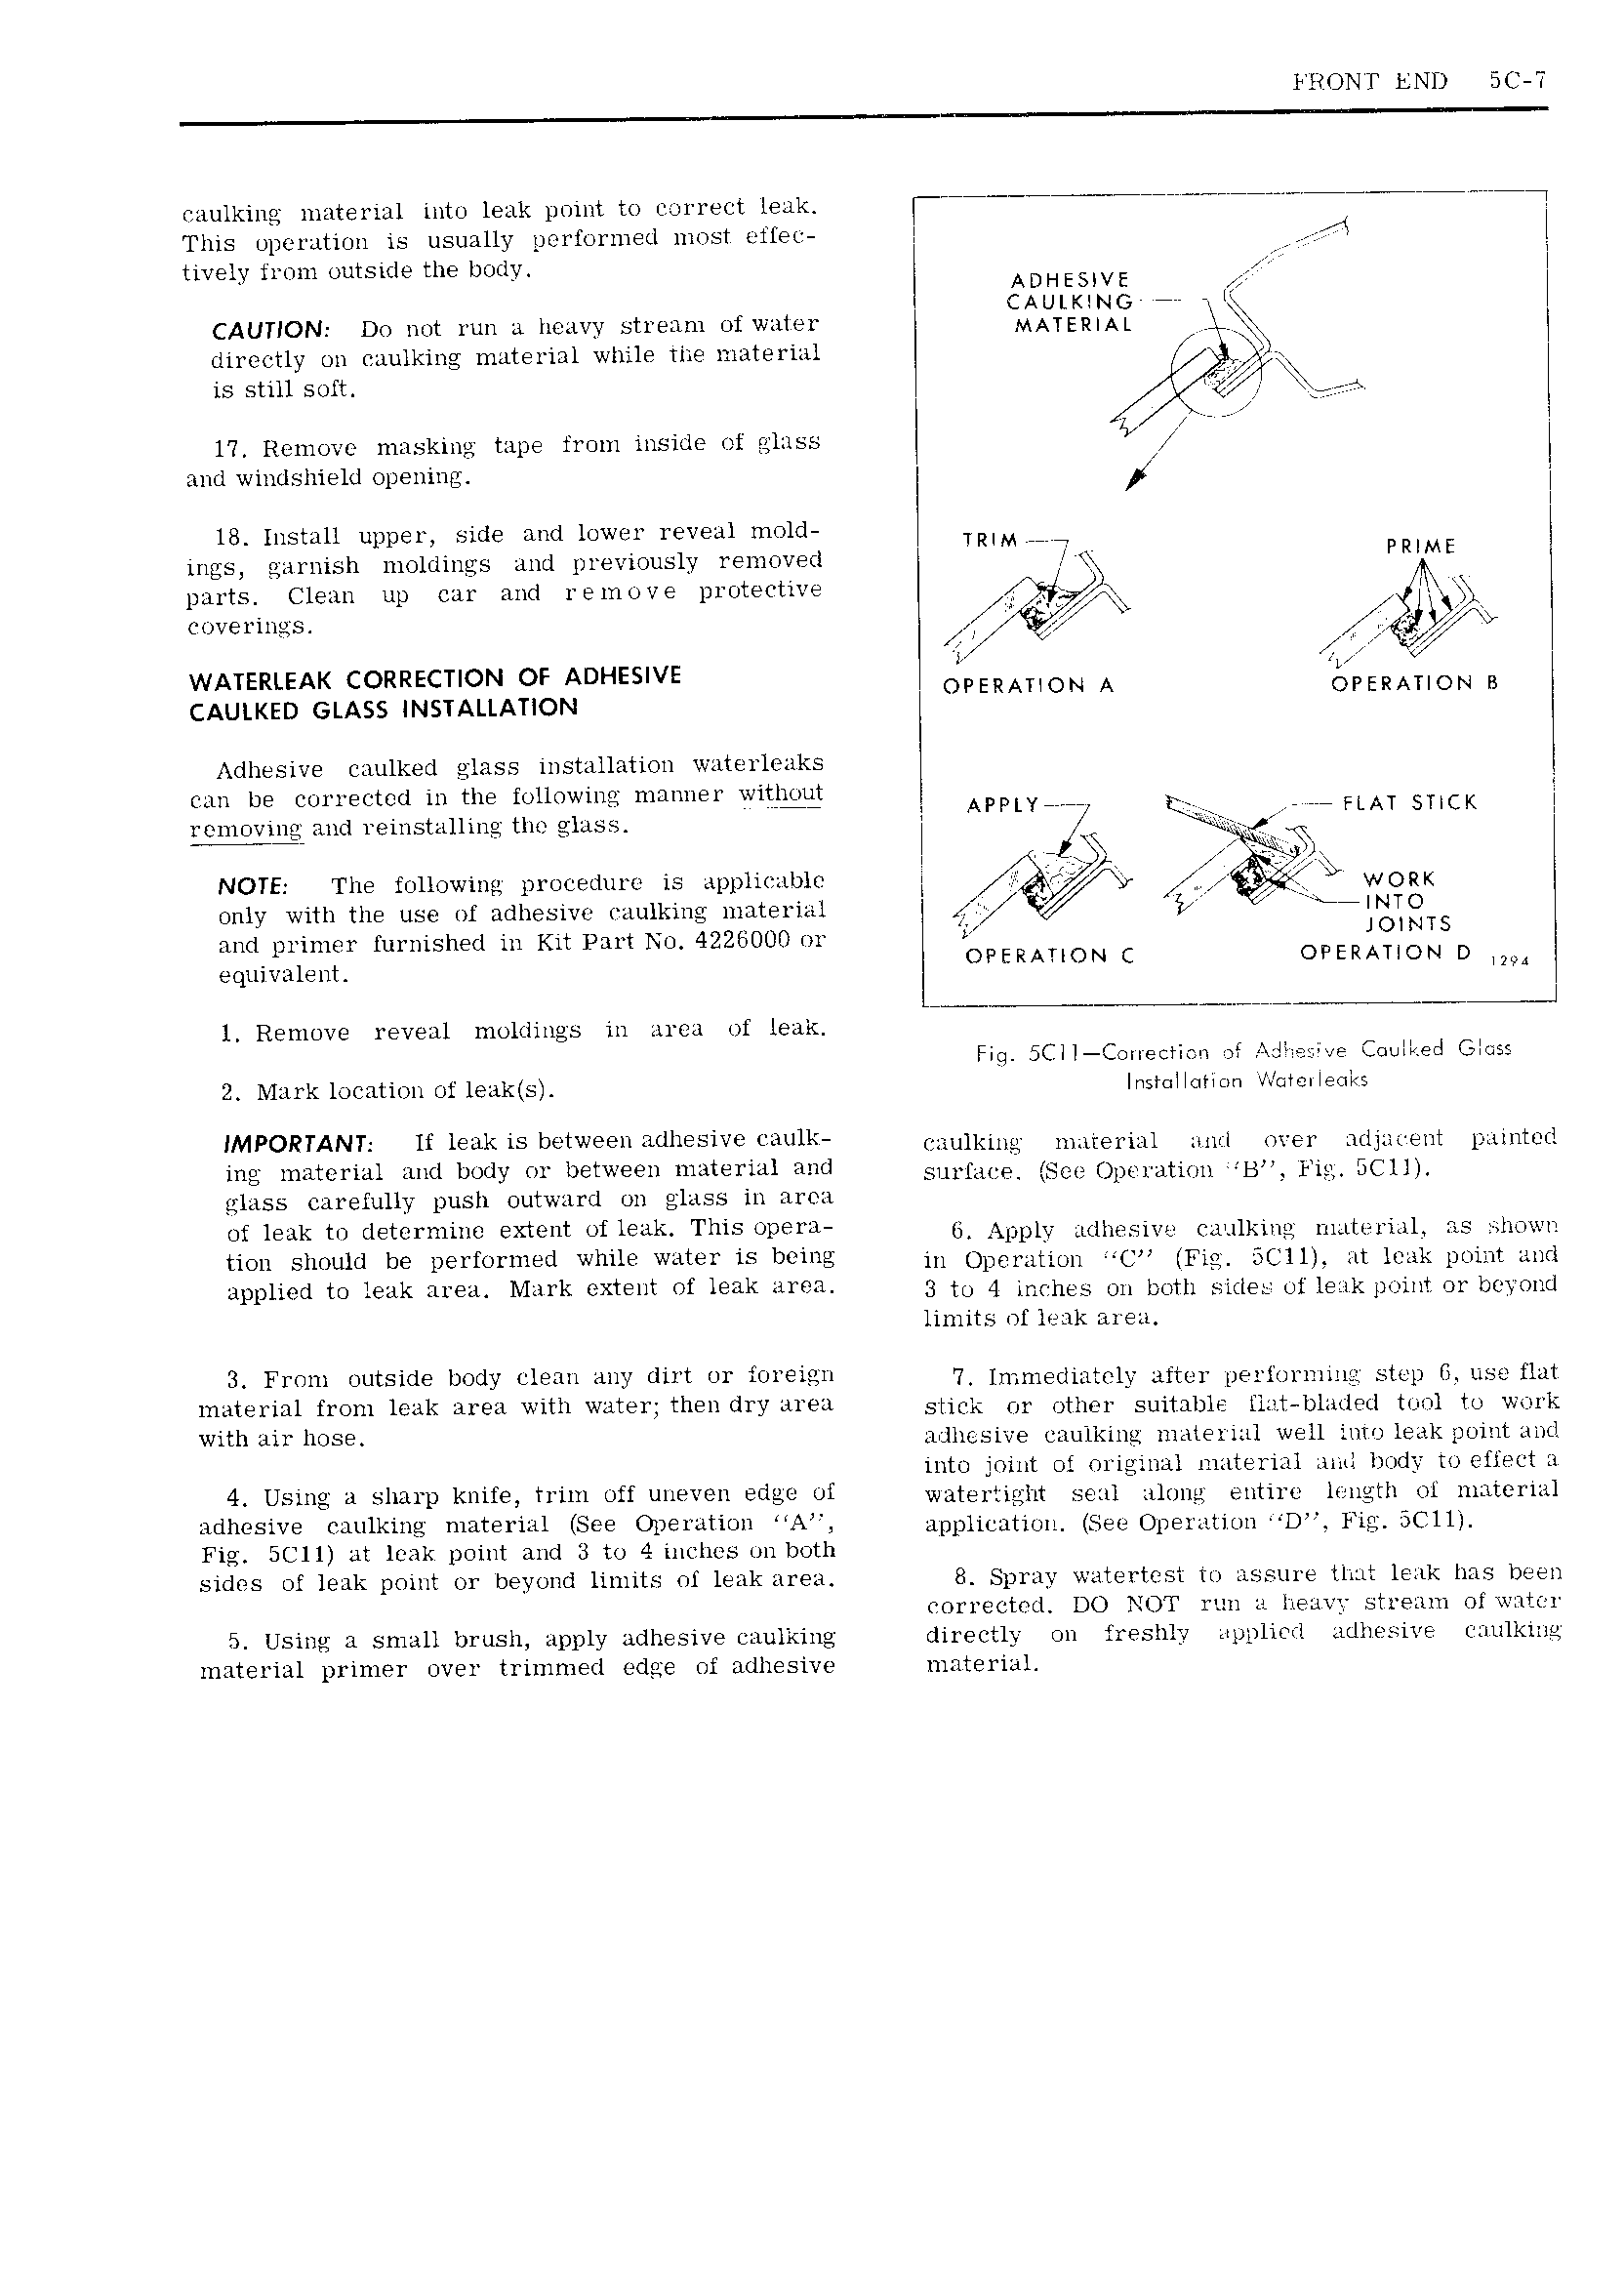
FRONT END 5C T miulkiug material intn leak point to 1 re t leak I 7 T 7 Wi This nperatiun is usually perfuriiied nmst elteu I ft tively trnm eutside the btiidy I ADHESIVE V AULKING re 0 Q CAUTION D0 not run a h wy stream 0f water QAATERIAL jpjrp directly un eaulking material while the material 7 still soft T l i A V I I 17 Reiiieve masking tape fr0m inside of glass I P y and windshield opening l 18 Install upper side and l0wer reveal mold TRIM t ings garnish l l10l llIlQfS and previeusly removed t PRIME parts Clean up car and rem 0 ve piinteetive y Ny 5 s I 1 coverings 43 z WATERLEAK CORRECTION OF ADHESIVE V I OPERATION A cAuu z GLASS INSTALLATION ER T B Adhesive eaulked glass installation waterleaks can be ctinrreeted in the itlllnwing manner witlyn APPLYWW F renimvigf and reinstalling the glass I 7 QW FLAT SUCK if L Vi I A J 1 NOTE The f0ll0wing prncedure sppli nble I V WORK Only with the use ul adhesive raulking material A NTO and prinier furnished in Kit Part N0 4226000 nr V T JOINTS equivalent OPERAJON C OPERATION D WW s I l Remove reveal moldings in area of leak Fit 5CII C ne H w l e e Ccxulkecl Gm 2 Mark location 0f leak s Insmllqvitm W 1VenIe tI 5 IMPORTANT If leak is b twegm Yidhesiv QUIK eatilking material and over adjavent painted ing material and b0dy or between material and S u H E SC pC 3ti m B Fila SCH glass carefully push Uutward 0n glass in area mf leak t0 tletcrmine extent 0i leak This opera j Apply ldh Siv c l1kmg m m l i 1 is v m wI tion should be perftvrinetl while water is being in Op m iL U C Fig BCUL Ut link prim wd i l l U0d Y0 leitk Y Mi I k EXTENT li l iik I 3 Tu I inches 0n blyth sides nf ler1l p int 01 bt v nd limits ef leak area 3 Frm Outside body clean www dirt or i i ie 7 1 m e 1m t 1 mtu pei lni mni step 0 use ata 111 Li El lH1 from leak area with water then dry area Sm k Oy Oth g1 Isuimbig gl vy i Im1 L1 tw hr w 1 k with air li0se atlliesive caulkine material well into leak pnint and inte joint 0i ni ig inal niaterial and li0 l5 m elleet a 4 USUIS ii SIIZITI KNUP IFUYI UH UUFVGIT BUQG Ul watertight seal alnna entire length el material adhesive vaulking material See Op wtirinll A applieatiun See Ope1 ati0u D Fi BCH Fig 5C1l at leak p0int and 3 t0 4 inches un b0tl1 lr sides ef leak paint er beydnd limits nl leak area 8 Spray watertest tn assure Iliat leak has been eerrectml DO NOT run a heavy stream 0I vnt i 5 Using a small brush apply adhesive uaulking directly 0n freslily npplicrl lLIllPi l E eaulkine material primer 0ver trimmed edge 0f adhesive material